*FYI - this post may contain affiliate links, which means we earn a commission at no extra cost to you if you purchase from them. Also, as an Amazon Associate I earn from qualifying purchases. Check out our Privacy Policy and Disclosure. for more info.
Mason Jar Candy Bouquets are a quick and easy DIY gift perfect for a variety of occasions, from Valentine’s Day and Christmas to birthdays and anniversaries.
And sure, while it may not pack the same alcoholic punch as our Beer Bouquet, it’s definitely a sweeter alternative, with plenty of opportunities for customization.

In this Mason Jar Candy Bouquet tutorial, we’ll be showing you step by step how to make this ultra easy candy gift, which we’re sure will impress all your loved ones this year.
We hope you find it helpful!
Pin for later:

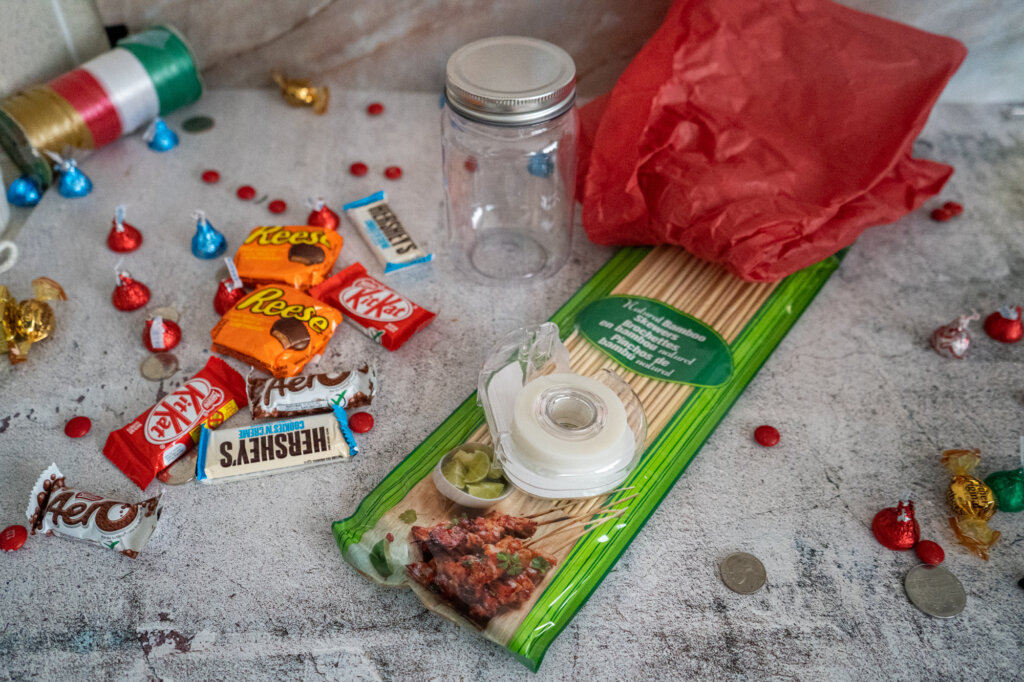
Materials for Your Mason Jar Candy Bouquet
For this easy DIY candy gift, all you need is:
- Mini Candy Bars Of Your Choice
- A Mason Jar
- Wooden Skewers
- Scotch Tape
- Styrofoam/Floral Foam
- Red tissue paper
- Pebbles/Stones (to weigh down the base)
How to Make a Mason Jar Candy Bouquet: Step by Step
Have all your materials gathered? Now let’s get to work…
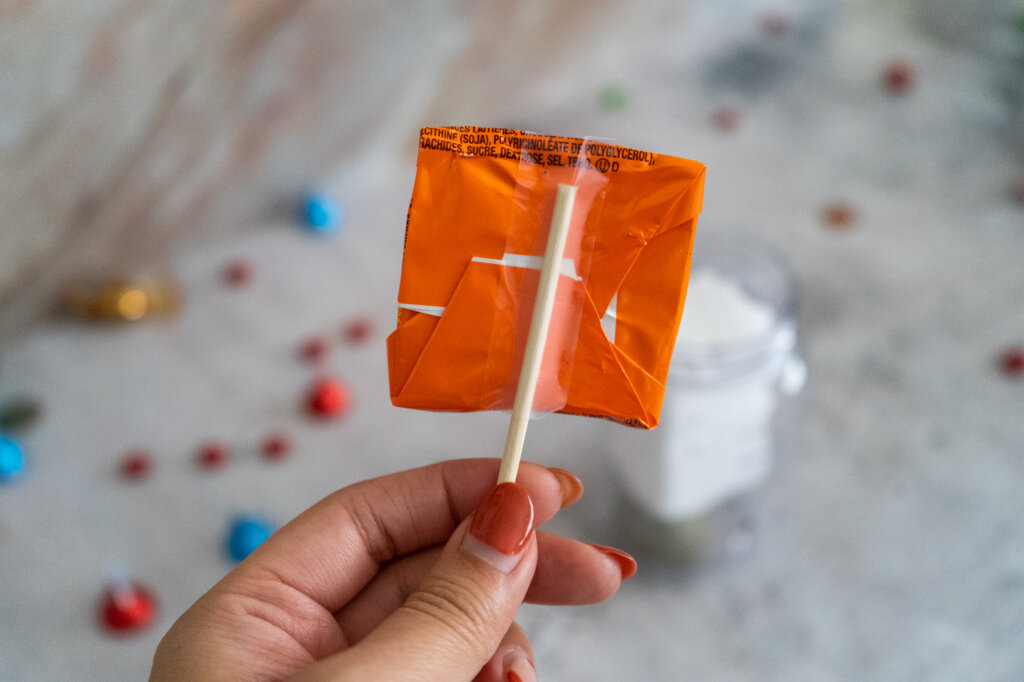
Step One: Make Your Chocolate “Flowers”
We’ll start by creating the special chocolate “flowers” for our bouquet. This is a super easy process and simply involves sticking wooden skewers on the back of our mini candy bars using tape.
If you have long wooden skewers, it might be worthwhile to trim them down a little bit so that the candy bars aren’t comically high relative to the mason jar.
To figure out how much to trim off, we held up our skewers with each chocolate bar up against the jar, to get a sense for how tall we wanted them to be in our final product.
After trimming the skewer, use a piece of tape to attach the skewer to the back of the candy bar and you’re done.
Flipping it around, it looks like this!
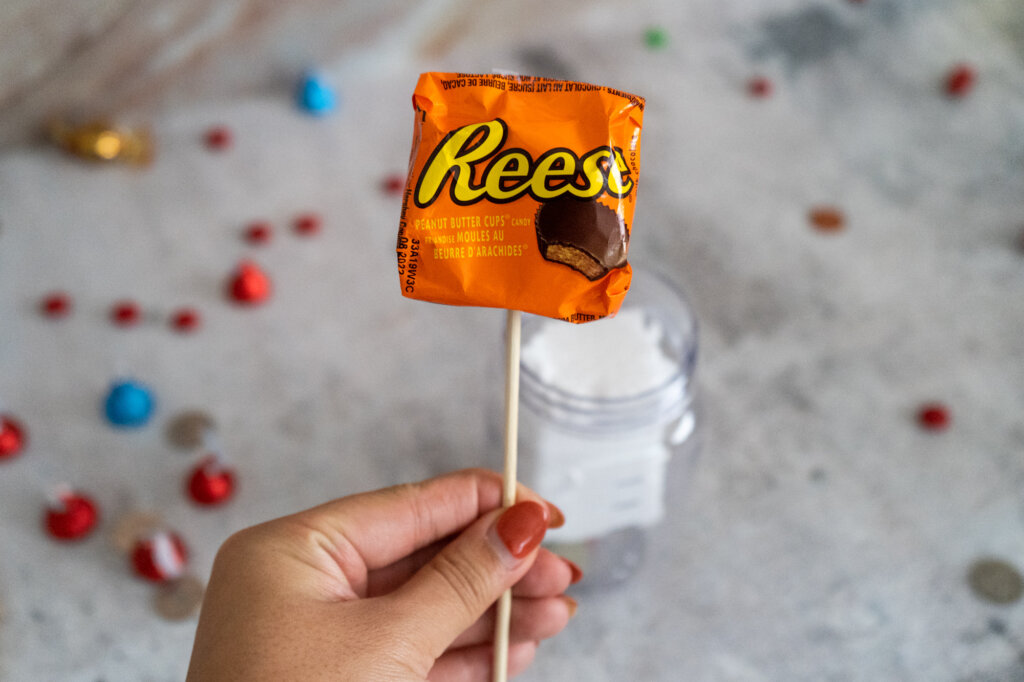
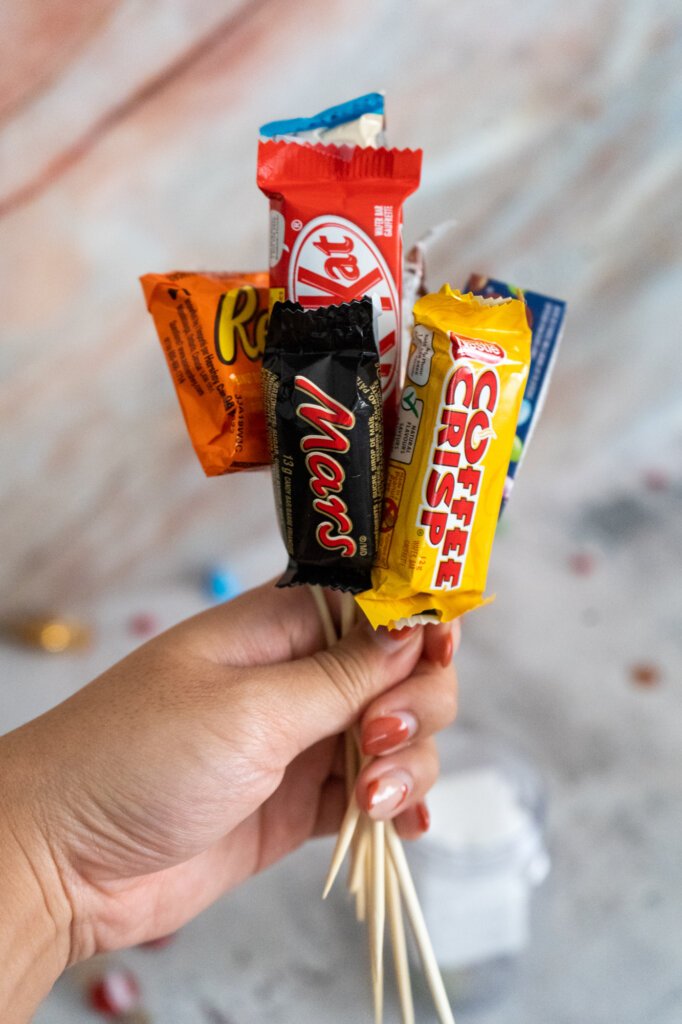
Repeat this same process for all your other candy bars, and set them aside.
Step Two: Prepare Your Base
After our flowers are completed, we need to prep our mason jar vase/base to ensure it’s steady enough to hold up all our flowers.
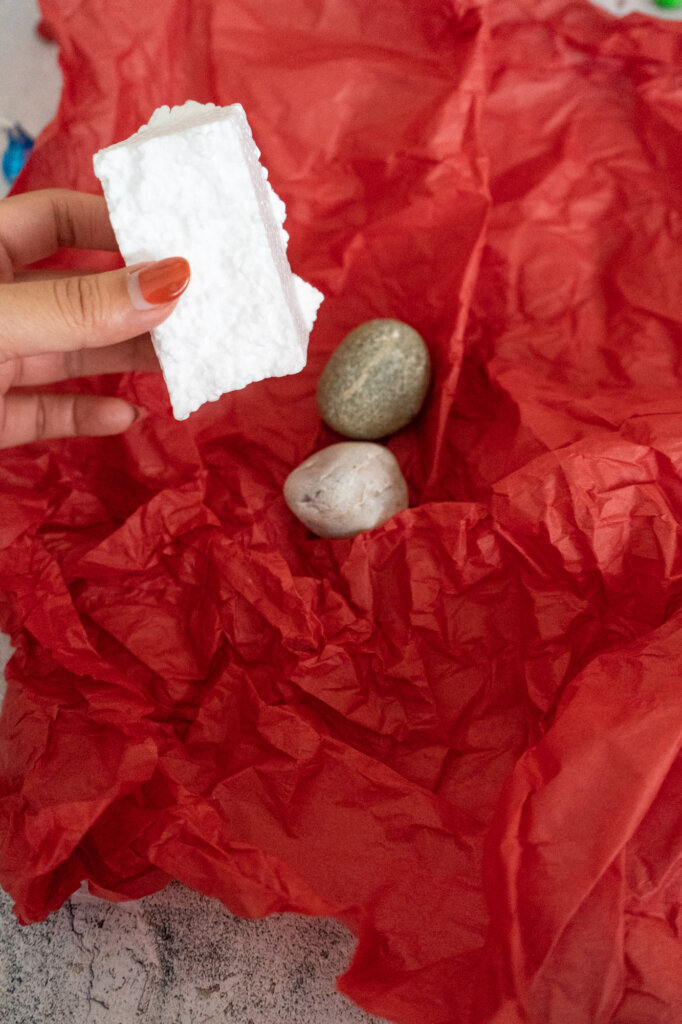
Since the candy bars are naturally quite heavy, it’s important that we put something heavy at the bottom of the jar (e.g. rocks) to weigh it down and create some stability, alongside something like styrofoam or floral foam that we can stick our skewers into.
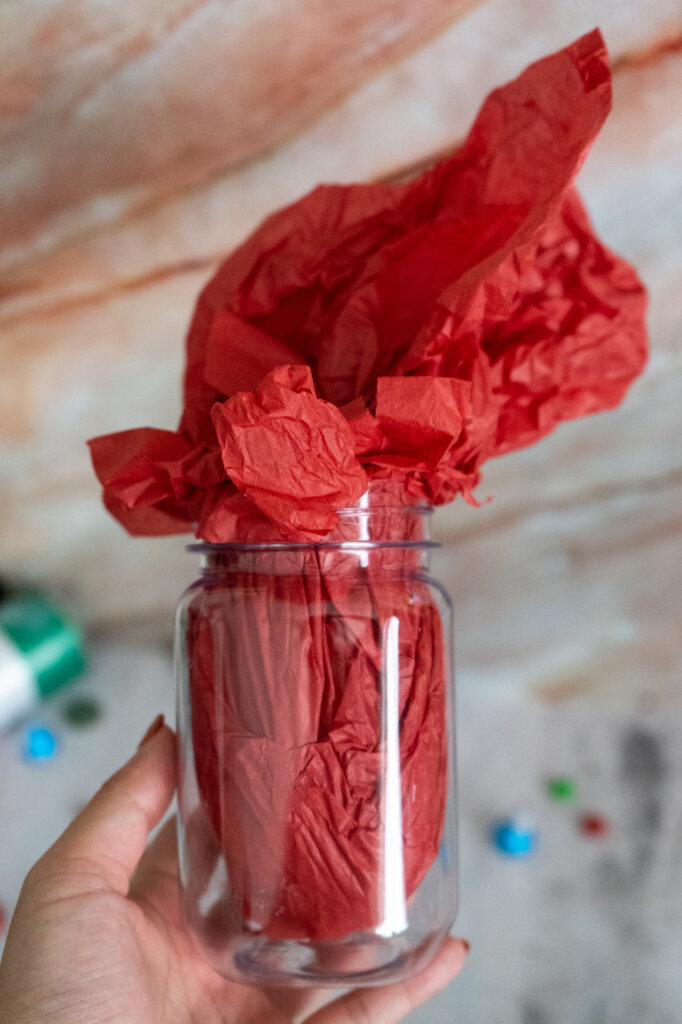
But, since the mason jars are clear, it would look kind of weird to just have rocks/foam floating around, so what we did was put some rocks and the block of foam on top of some red tissue paper, and used the red tissue paper to wrap around this base to cover it completely. We then placed this bundle into the jar.
If we were to do this project again, we would consider just putting the tissue paper directly into the jar, using it to line the bottom of the jar and creating a little pocket for the rocks/styrofoam. This might be an easier way to do it, but wrapping tissue paper around the rocks/styrofoam, then inserting it into the jar worked fine for us.

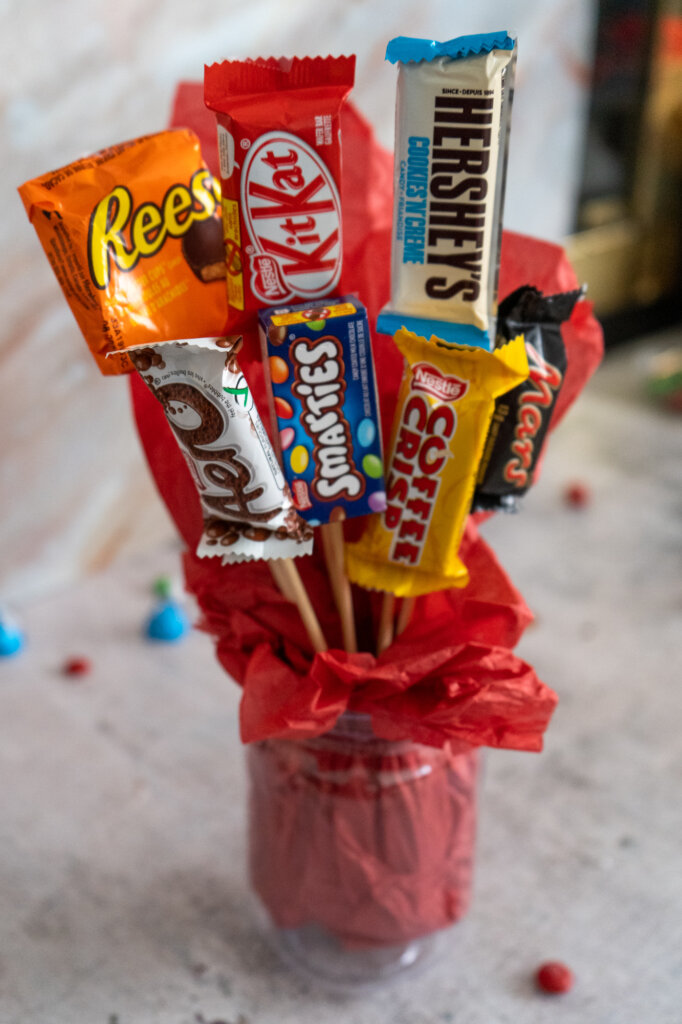
Step Three: Insert Your Chocolate Flowers
Now that you have your styrofoam block and base secured, all that’s left to do is stick your skewered chocolate bars into the styrofoam.
To make this DIY candy bouquet look a little more bouquet-like, we’d recommend sticking them in at an angle, creating a fan like shape. Of course, if it’s looking sparse, feel free to add more chocolate bars!
Step Four: Add the Final Touches
After the chocolate flowers have all been stuck in, it’s time to add some final touches, such as a cute punny note or perhaps some ribbon.
After that, you’re all done! Check out this adorable DIY gift you just created:

We Hope You Enjoyed This Mason Jar Candy Bouquet Tutorial!
Let us know in the comments if you have any questions, or send show us a photo of your creation!