*FYI - this post may contain affiliate links, which means we earn a commission at no extra cost to you if you purchase from them. Also, as an Amazon Associate I earn from qualifying purchases. Check out our Privacy Policy and Disclosure. for more info.
Chocolate and Candy Shadow Boxes are the easiest ever DIY gifts that are perfect for any occasion.
If you’re looking for unique ways to gift candy, it doesn’t get any easier than this.
Less than 5 minutes, and you have a polished and pretty gift that doesn’t break the bank. Plus, you can customize it with whatever candy your gift recipient loves, ensuring it will be a sweet success no matter what.
In this Chocolate and Candy Shadow Box tutorial, we’ll be showing you step by step how to make this ultra easy DIY gift, which we’re sure will dazzle any sweet tooth on your gift list this year.
We hope you find it helpful!
Pin for later:
Materials for Your Candy Shadow Box
For this easy DIY Christmas gift, all you need is:
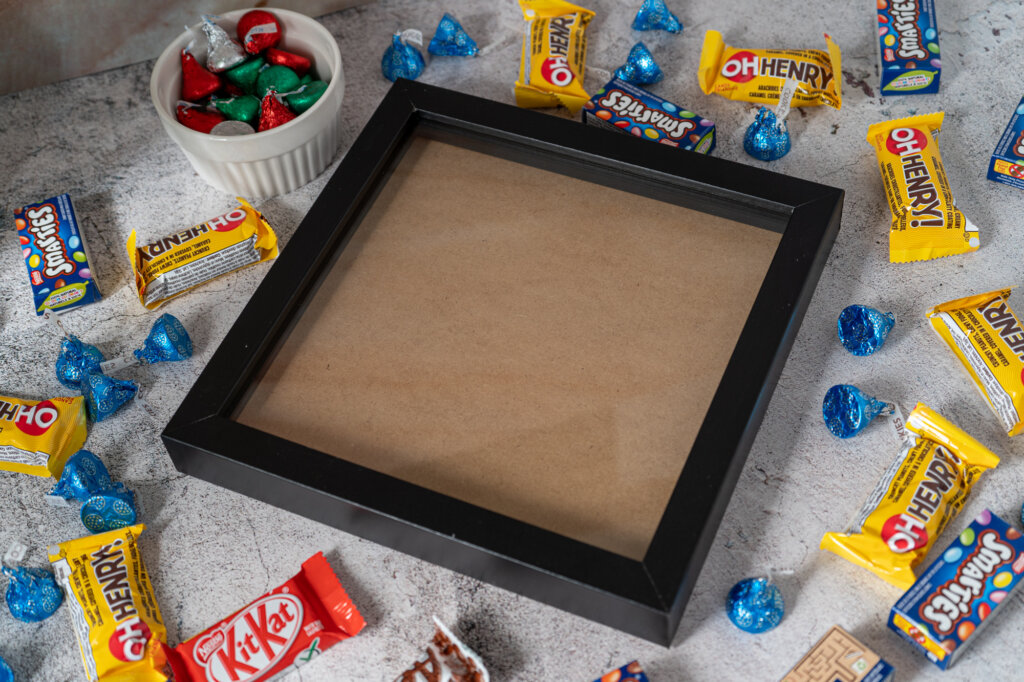
- A shadow box
- Your candy/chocolate of choice
How to Make a Candy Shadow Box: Step by Step
Have all your materials gathered? Now let’s get to work…
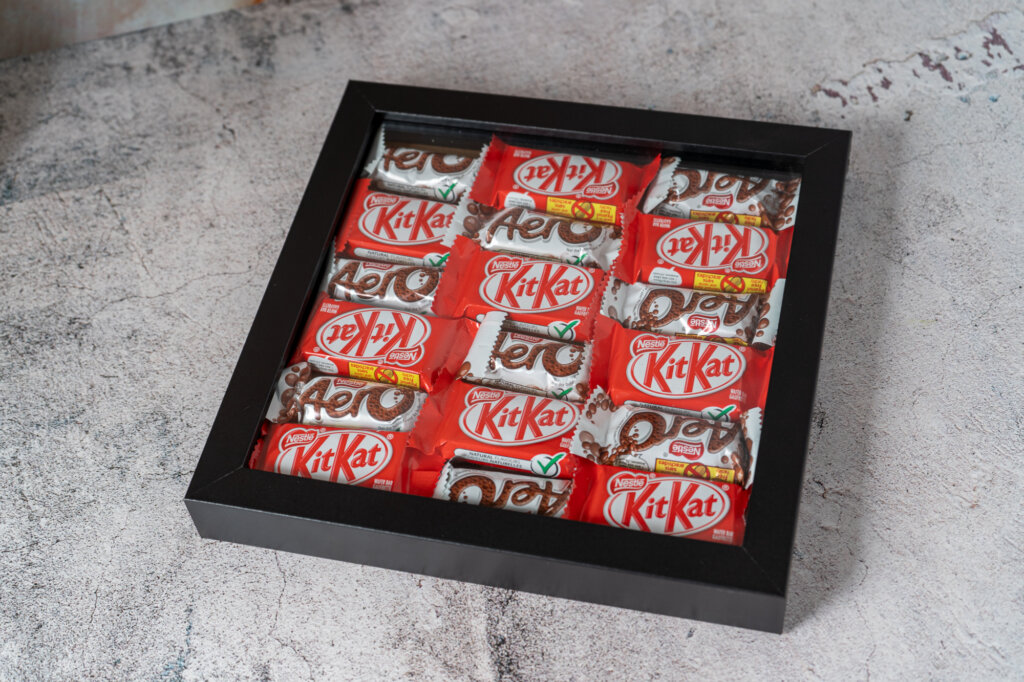
Step One: Open Up Your Shadow Box and Add Your Candy
Flipping your shadow box around, open it up by pushing up the prongs and removing the back of the box.
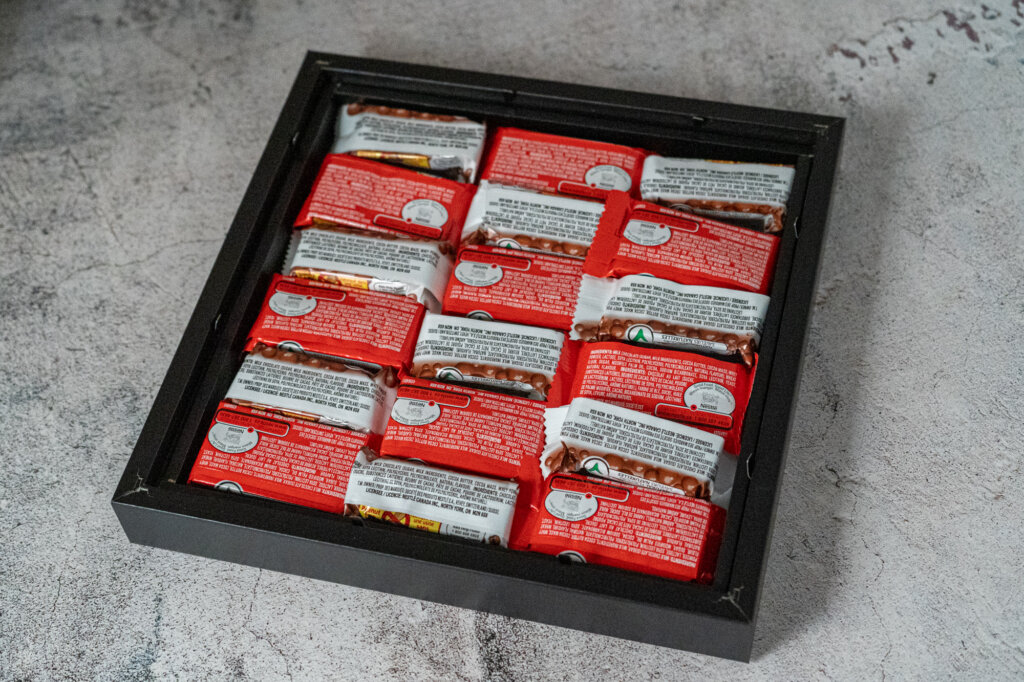
Then, carefully add your candy/chocolate choice in whatever formation you desire, face down onto the glass. No need for tape or any kind of adhesive, since the backing board should hold it all properly in place.
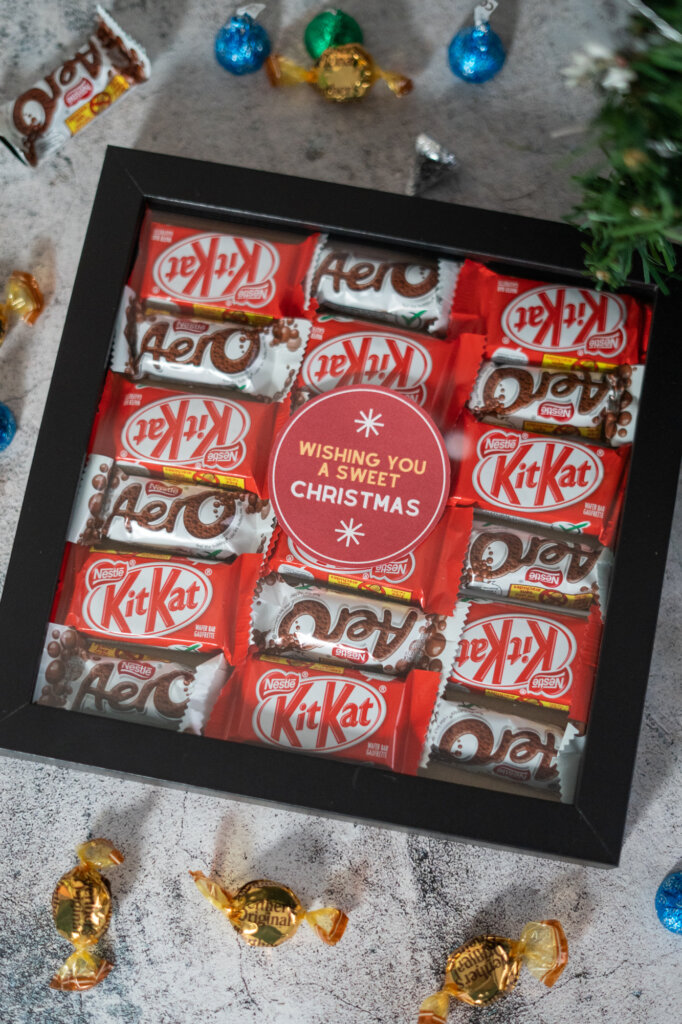
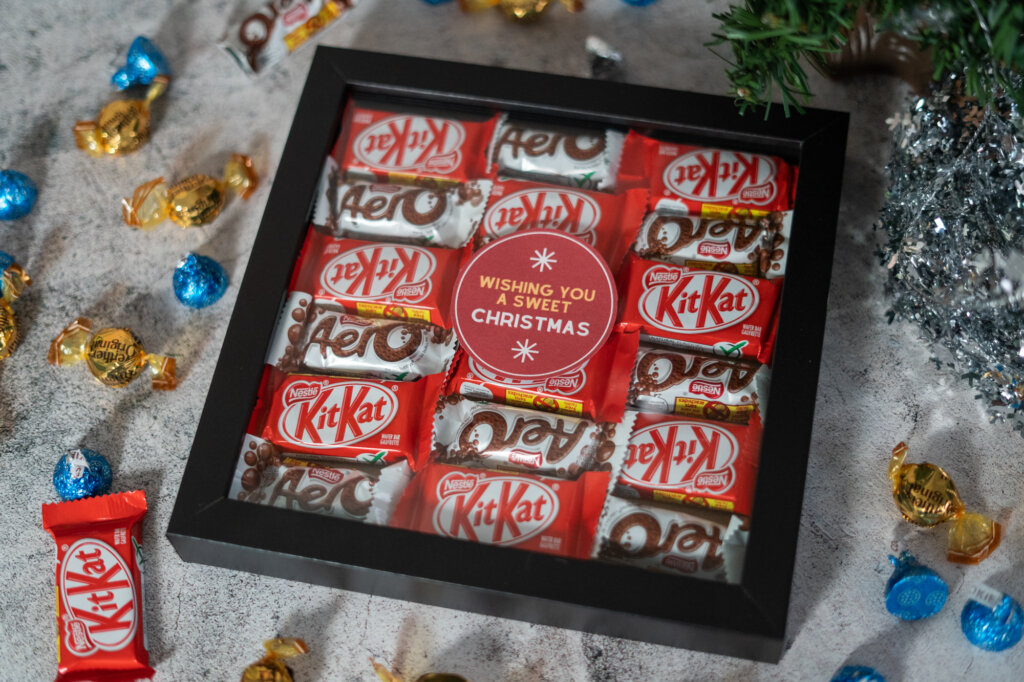
For ours, we wanted it to look somewhat Christmassy so we added Kit Kats and Aero in an alternating pattern.
While placing your candy down, ensure that you are thinking of what it looks like on the other side. Most importantly, make sure the bars aren’t upside down, or facing the wrong way.
Once you’re done, place the backing back on your shadow box, push the prongs back down and flip your shadow box around.
Now is the time to fix any mistakes! As you can see, we accidentally had a few of our bars upside down, but honestly we thought it still looked fine so kept it that way. If you’re more of a perfectionist though, now is the time to open it back up and fix any imperfections.
Step Two: Add Your Finishing Touches
Yes, you’re already pretty much done! We told you this was a super easy DIY gift.
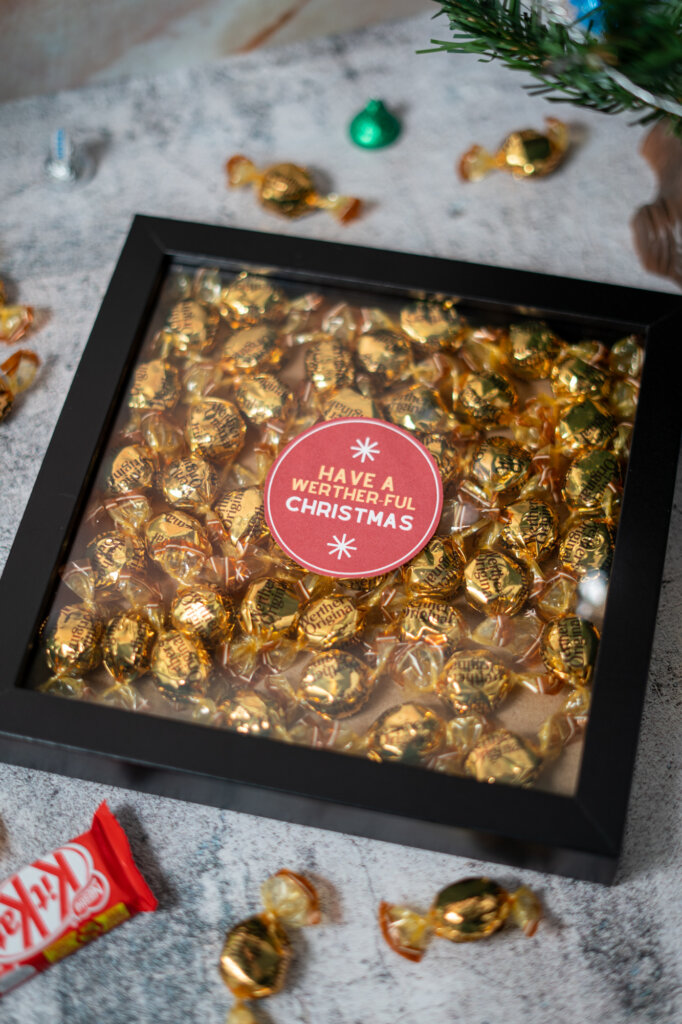
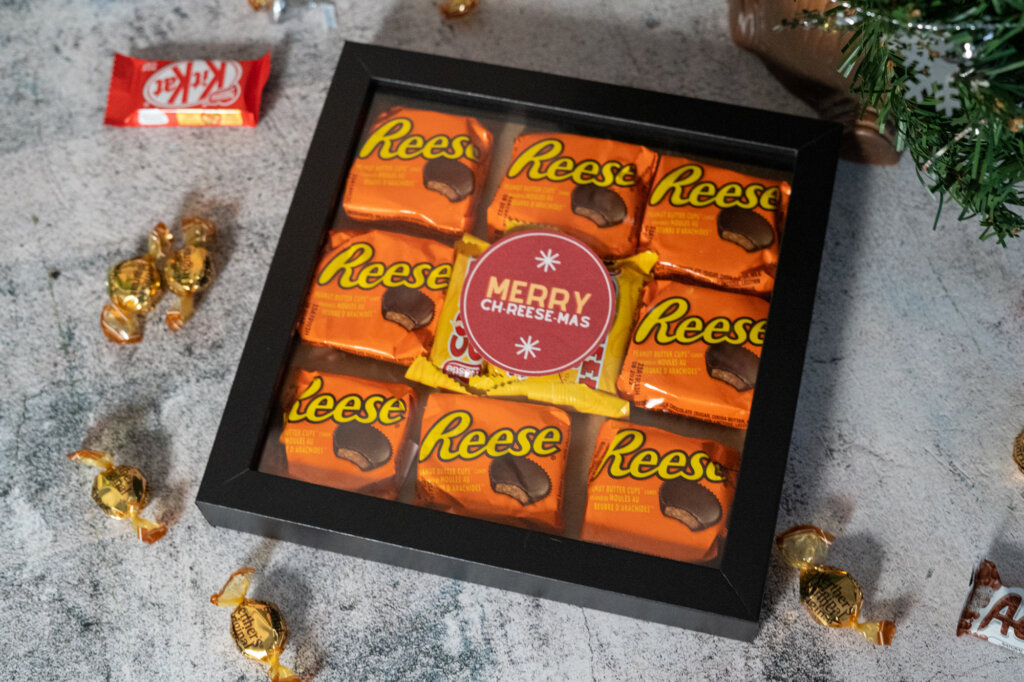
All that’s left after you’ve finished arranging your chocolate is adding a cute tag on the front (here are printable versions of ours), or possibly wrapping it up with some ribbon.
Ta-da – wasn’t that easy?
Additional Ideas for Candy/Chocolate Shadow Boxes
We personally think that candy shadow boxes are an amazing gift as-is, but here are some additional ideas to take them up a notch:
Add a hidden note inside the box
We’re big fans of handwritten notes, and if you’re gifting this candy shadow box to someone special, then a great way to make it extra thoughtful is by adding a small note on top of your candies before putting the backing back on the shadow box.
This ensures that the note is the first thing they see when they open the shadow box!
Stick photos on the backing
Another way to make your DIY candy shadow box super thoughtful is by adding a collage of photos or something to the backing of the box, which is covered by the candy at first glance but then a happy surprise when they open up the box.
This also helps prevent awkward backing gaps in your shadow box, as seen in this example:
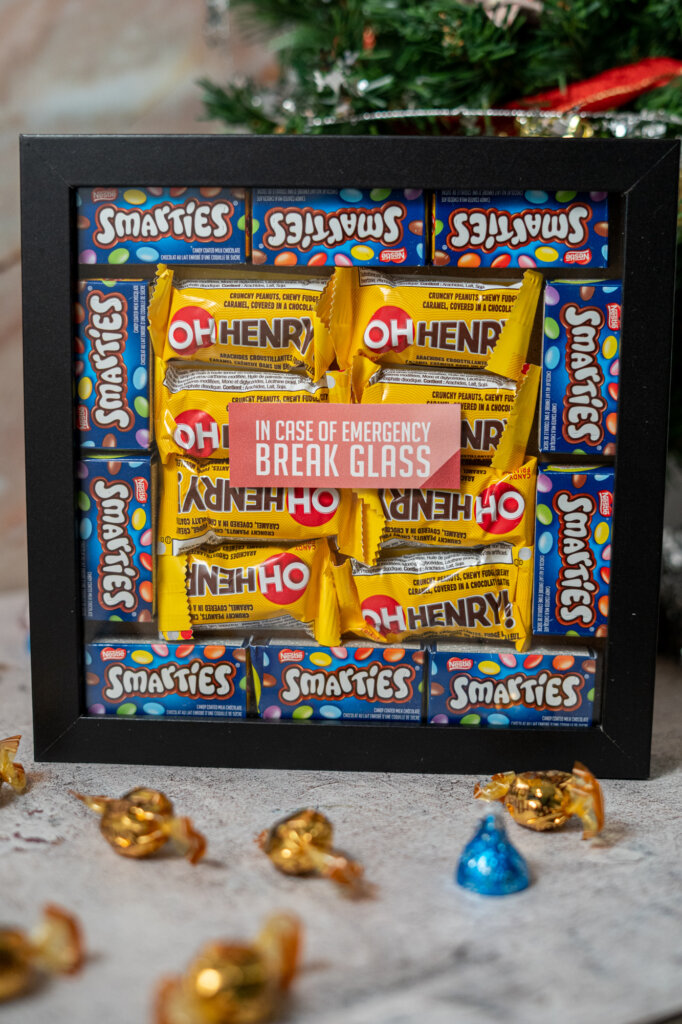
Add a funny saying to the front
To make this candy shadow box a gift that works year-round, consider adding a funny saying like “In case of emergency, break glass” to the front:
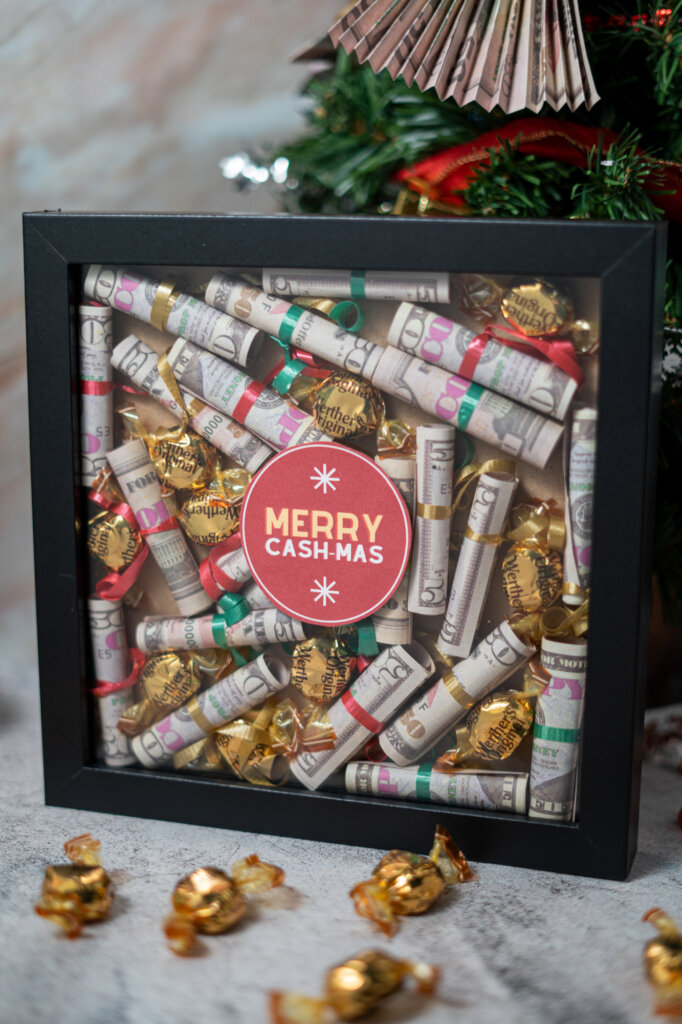
Add some cash
And if you’re looking for creative ways to gift money, another great way to spruce up your Candy Shadow Boxes is by rolling up a few bills, securing them with curling ribbon, and adding them into the shadow box alongside some candy.
We Hope You Enjoyed This Candy Shadow Box Tutorial!
Let us know in the comments if you have any questions, or send show us a photo of your creation!