*FYI - this post may contain affiliate links, which means we earn a commission at no extra cost to you if you purchase from them. Also, as an Amazon Associate I earn from qualifying purchases. Check out our Privacy Policy and Disclosure. for more info.
They say that the quickest way to a man’s heart is through his stomach. My life experience has told me however that video games might be a more accurate statement. Because I am a resourceful girl, I decided to combine both of these last year to create an Xbox Controller Cake for my boyfriend’s birthday.
Truly, I’m a Nintendo girl at heart, so one might ask: why Xbox? Well, to be perfectly honest, the controller seemed like an easy shape to carve, and my laziness at the time outweighed my devotion to Link, Mario and all my Nintendo favourites.
[Edit: I couldn’t resist myself and made an N64 cake the following year. Check it out!]
After doing plenty of research online, I set forth to make the most badass XBox cake I could envision… and surprisingly, it wasn’t even that hard. Here’s how you do it:
Pin for later:
What you’ll need:
A cake recipe (my go-to is here)
White fondant (I make my own. Recipe here)
[Canadian] Smarties or M&Ms
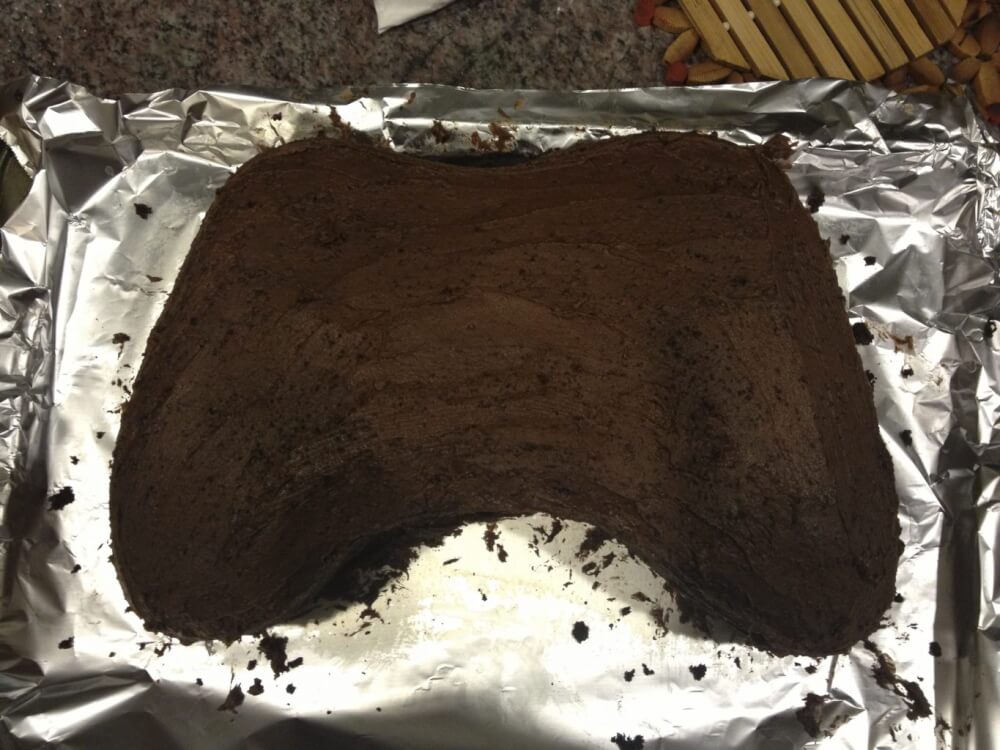
The (XBOX CONTROLLER SHAPED) Cake
Bake up 2 9×13 pans of your favourite cake recipe and whip up some delicious frosting. Flatten the top of one layer with a serrated knife, and stack the other layer on top of it. Carve out the shape of an Xbox controller (referring to images online if you need help) and frost the entire cake after the shape has been carved.
The Fondant TOPPING FOR OUR XBOX CAKE
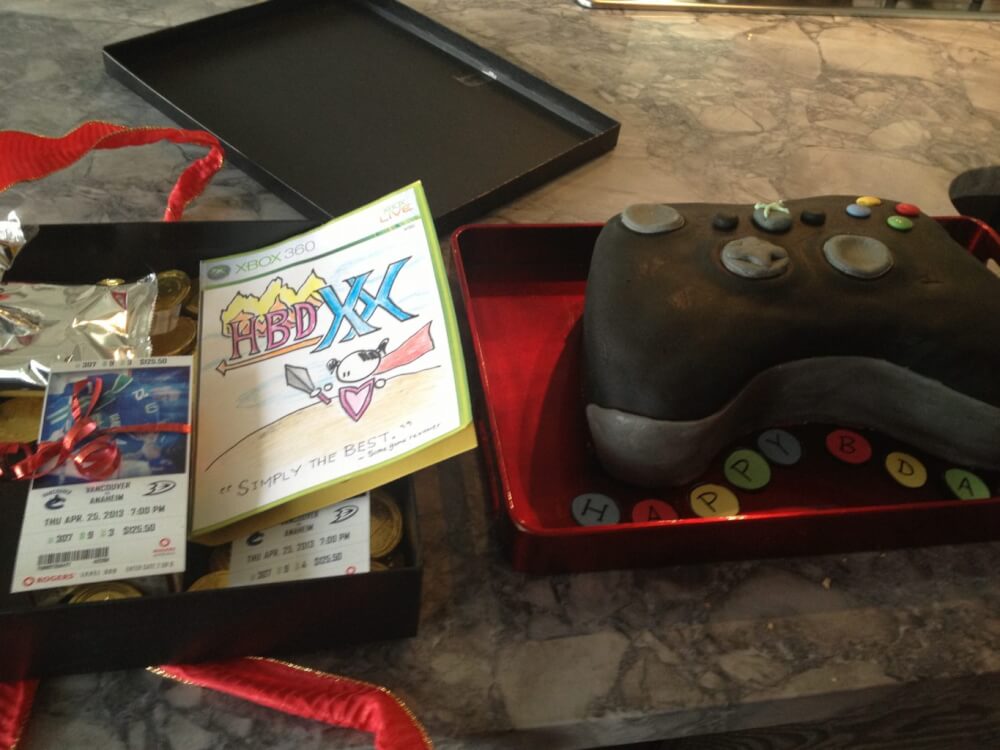
I definitely suggest buying a box of black fondant from your local craft/cake supply store. Making black fondant on your own can be very tough! Roll it out nice and thin, roll it onto your rolling pin and drape it over your cake. Smooth the fondant down with your hands, and trim the excess fondant with a knife or pizza cutter. New to fondant? This video shows you how to use it!
FINAL XBOX CAKE Details
Use Smarties for the colourful buttons on the right.
Mix your black fondant with some white fondant to create grey and then make place the buttons down as necessary. To create an even fancier effect, create an indent in the cake with your thumb to hold these buttons. This will make them look like they’re firmly embedded in the cake.
For the logo, tint some white chocolate with green food colouring, melt it in the microwave and pipe it out carefully with a Zip Lock bag.

BONUS: AN XBOX Card TOO
Having a matching Xbox game-themed card really completes this gift! Plus, it’s very easy to do. Many blank game cover templates are available online (for example, here). Just print it out, draw as you wish and glue it onto some cardstock!
And there you have it! Piece of cake. Literally.