*FYI - this post may contain affiliate links, which means we earn a commission at no extra cost to you if you purchase from them. Also, as an Amazon Associate I earn from qualifying purchases. Check out our Privacy Policy and Disclosure. for more info.
DIY Candy Wreaths are a simple, but adorable gift idea if you’re looking for unique ways to gift candy this Christmas.
Easily customizable with your candy bars of choice, this decorative yet delicious gift is sure to be a hit for anyone on your list this Christmas… and best of all, it doesn’t cost very much to make!

In this DIY Candy Wreath tutorial, we’ll be showing you step by step how to make this ultra easy gift, which we’re sure will impress all your loved ones this year.
We hope you find it helpful!
Pin for later:

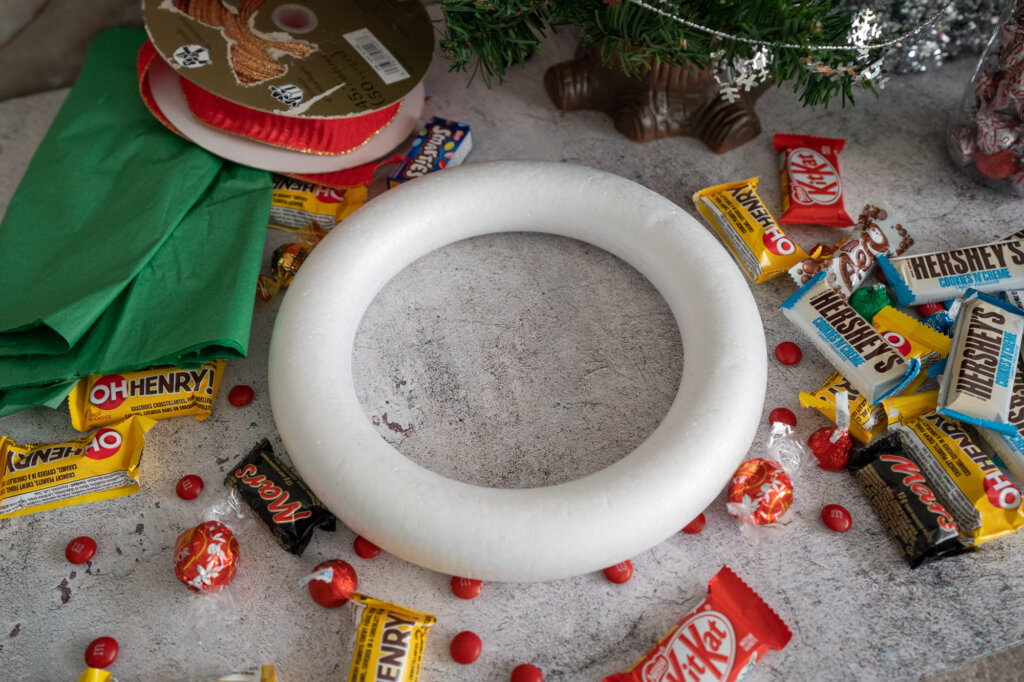
Materials for Your DIY Candy Wreath
For this easy DIY Christmas gift, all you need is:
- A styrofoam ring
- Tons of assorted mini candy bars
- Two candy canes (for the top heart)
- OPTIONAL: Green tissue paper (or ribbon)*
- Wired ribbon
- Hot glue
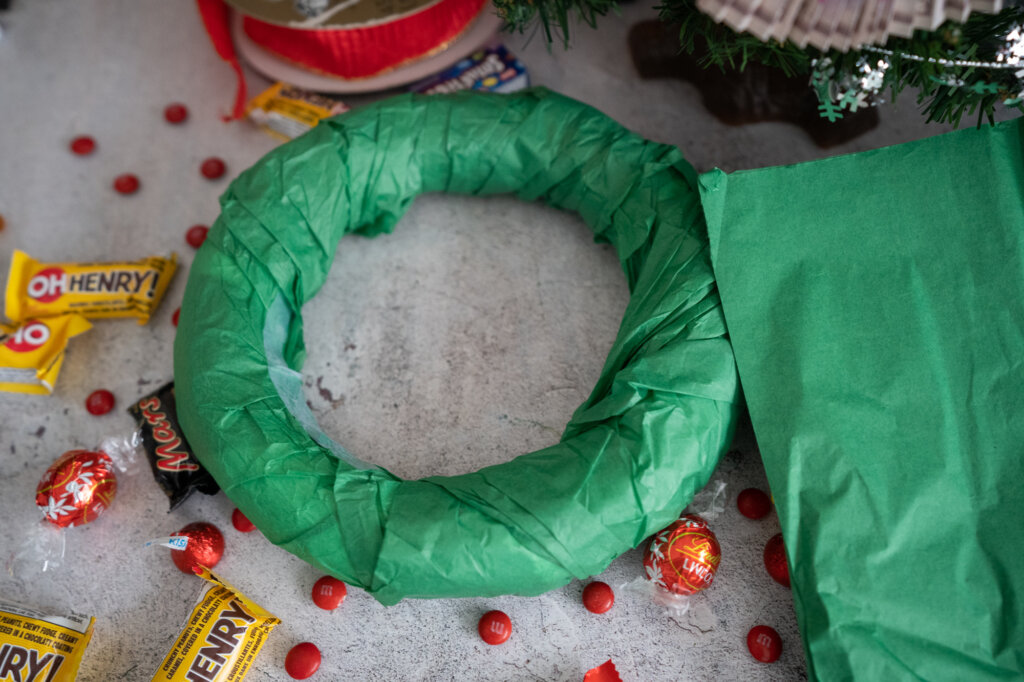
*NOTE: We decided to cover our styrofoam ring with some green tissue paper beforehand to cover up the white. This looked nice, but when it came time to remove the candy bars for consumption, we found that the tissue tore off really easily and left the styrofoam ring in a pretty grim-looking state.
Covering your ring beforehand is totally optional, but if we were to do this project again, we would recommend covering the ring in ribbon instead so that it doesn’t tear off as easily when people go to grab their candy.
How to Make a DIY Candy Wreath: Step by Step
Have all your materials gathered? Now let’s get to work…
(OPTIONAL) Step One: Cover Up Your Styrofoam Ring
Again, this step is by no means mandatory, but if you want to conceal the white styrofoam beneath your candy, then we’d recommend covering it up with some ribbon.
As mentioned above, we used green tissue paper for this purpose, but found that it was very quick to tear when we removed the candy for consumption purposes. To prevent tearing, we’d recommend covering the wreath in ribbon instead.
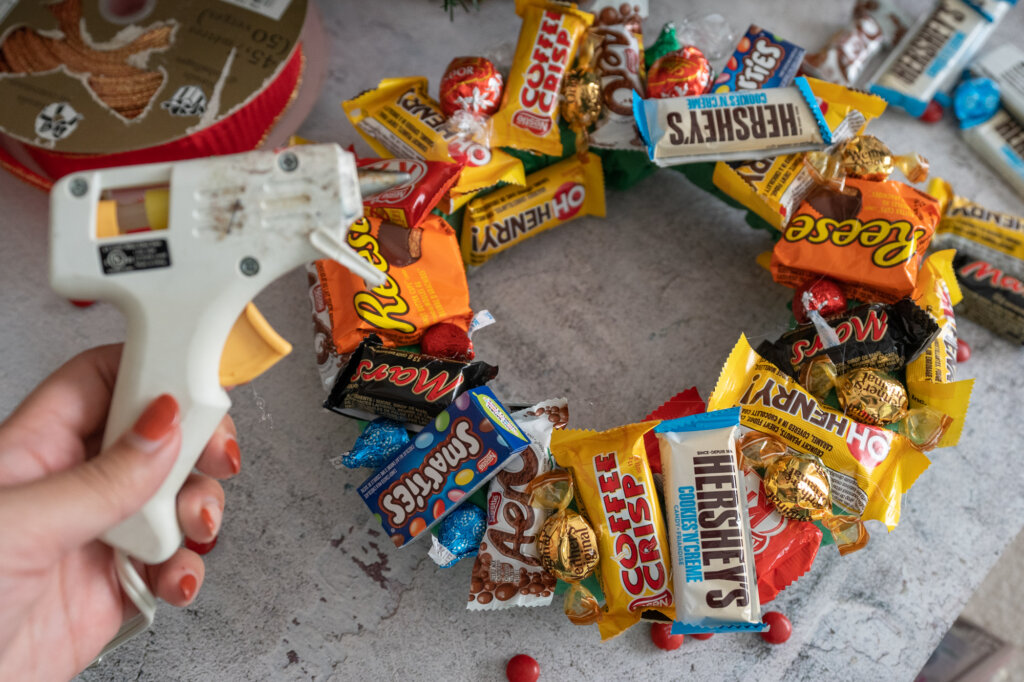
Step Two: Attach your candy bars
Using a hot glue gun, add a dab of hot glue onto the back of your candy bar and stick it onto the wreath.
Make sure you don’t add too much glue, otherwise it will be impossible to rip the candy bars off later.
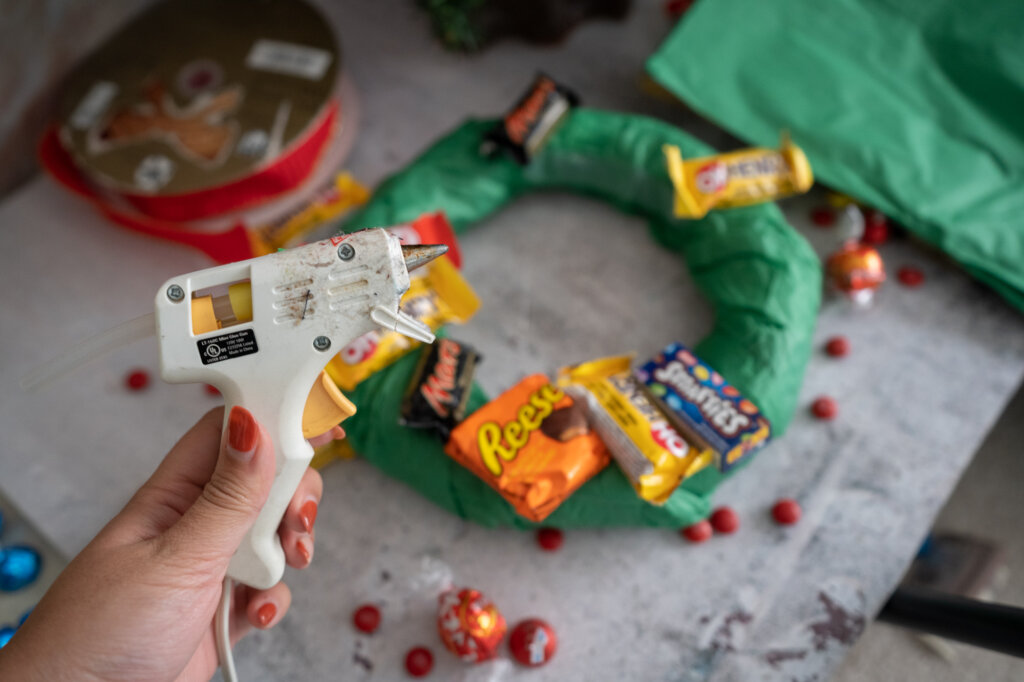
We’d recommend adding a ring of mini candy bars first as a base, then filling in gaps with smaller candies:
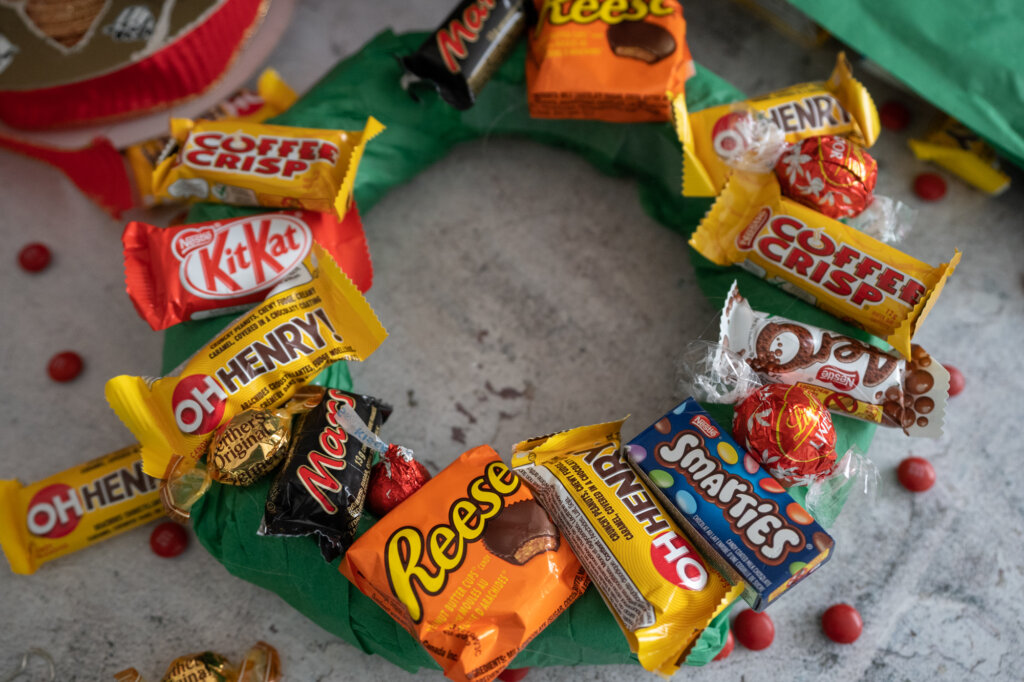
If you want to be especially generous, you can add additional layers of candy bars to cover up cracks, and even cover the back with candy as well.
NOTE: Make sure you don’t miss the inside of the ring! We found that lining the inside of the candy wreath with bars helped fill it out and make it look a lot nicer.
Step Three: Add your Ribbon
Cut off a strip of ribbon and tie it around your wreath. Tie a first knot to secure the ribbon on the wreath, then tie another loop to ensure your wreath is nice and hangable.
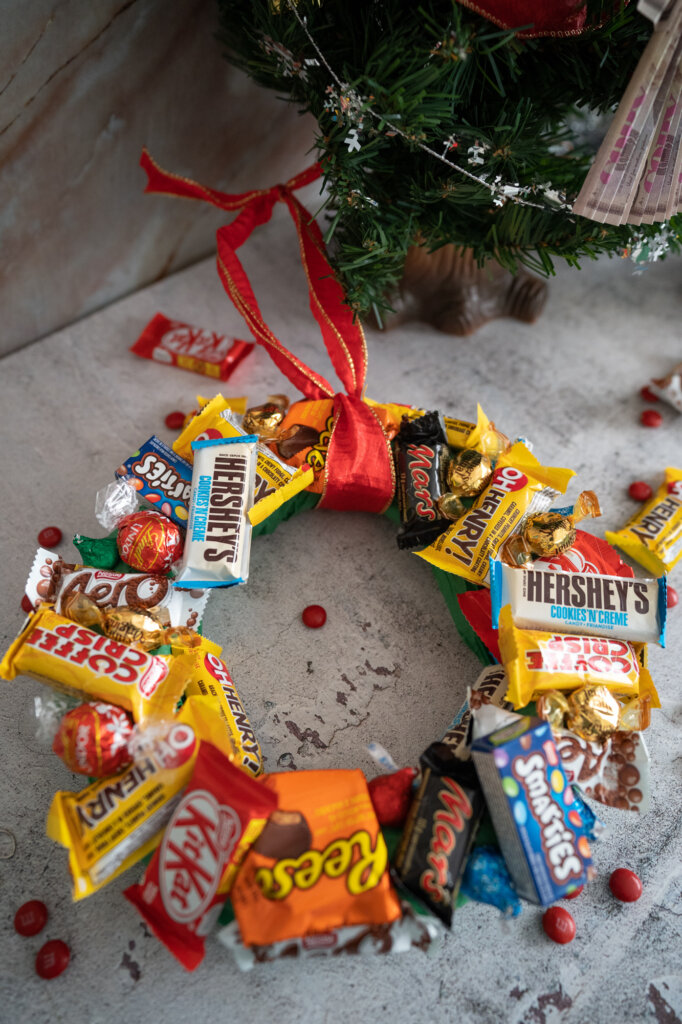
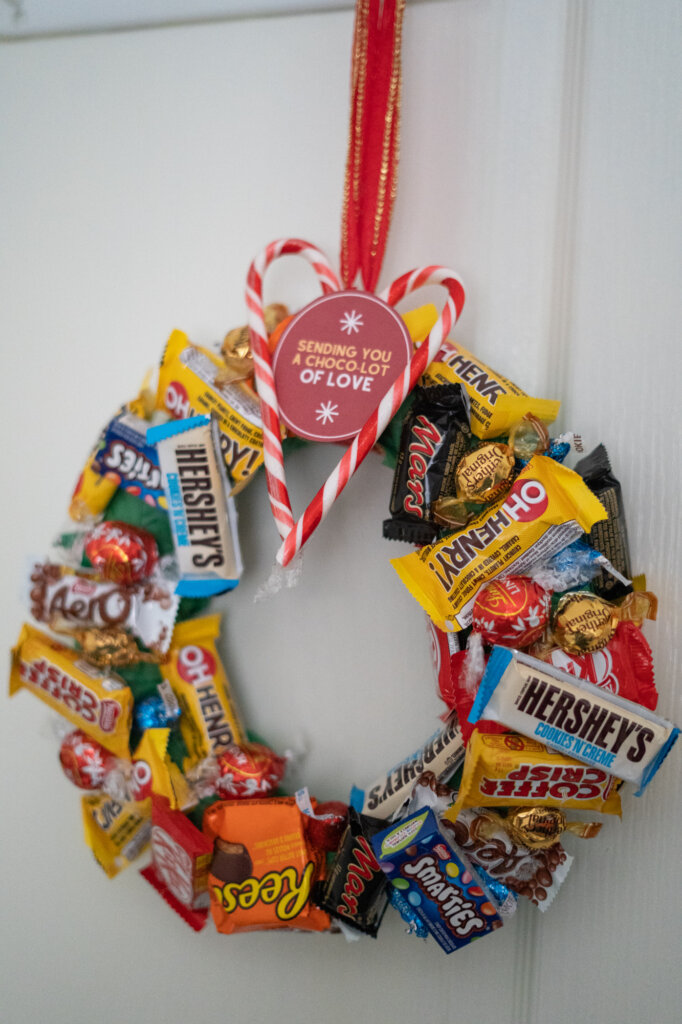
Step Four: Add Your Finishing Touches
Once you’re satisfied with the fullness and look of your wreath, it’s time to tie it all together with some finishing touches!
We hot glued two candy canes to the top to form a heart, and also attached a punny note in the middle.

Step Five: Hang Up or Gift Your Creation
Now that your DIY candy wreath is complete, all that’s left is to hang it up somewhere in your house, or if you’re gifting it, to send it off to your lucky wreath recipient!
Take some time to admire your handiwork too, of course!
We Hope You Enjoyed This DIY Candy Wreath Tutorial!
Let us know in the comments if you have any questions, or send show us a photo of your creation!