*FYI - this post may contain affiliate links, which means we earn a commission at no extra cost to you if you purchase from them. Also, as an Amazon Associate I earn from qualifying purchases. Check out our Privacy Policy and Disclosure. for more info.
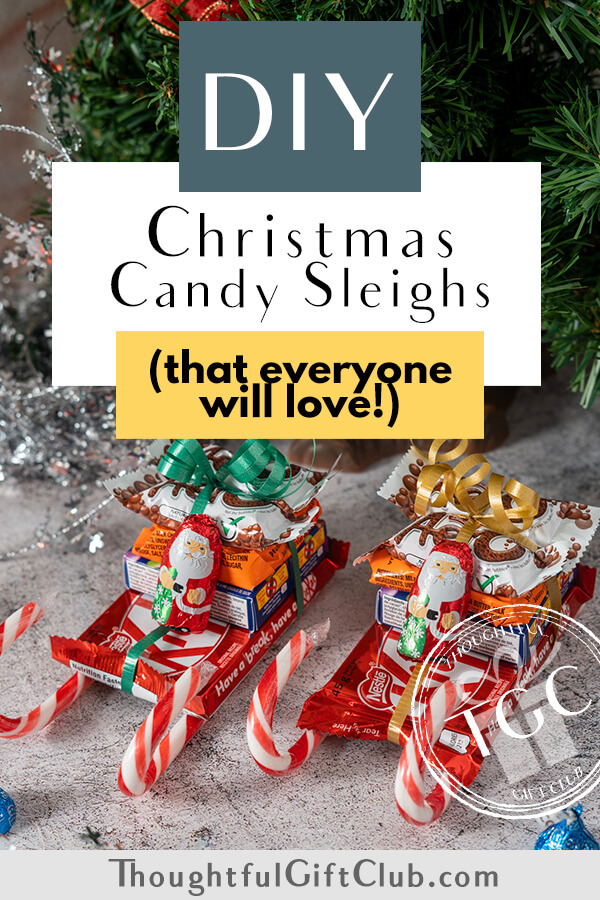
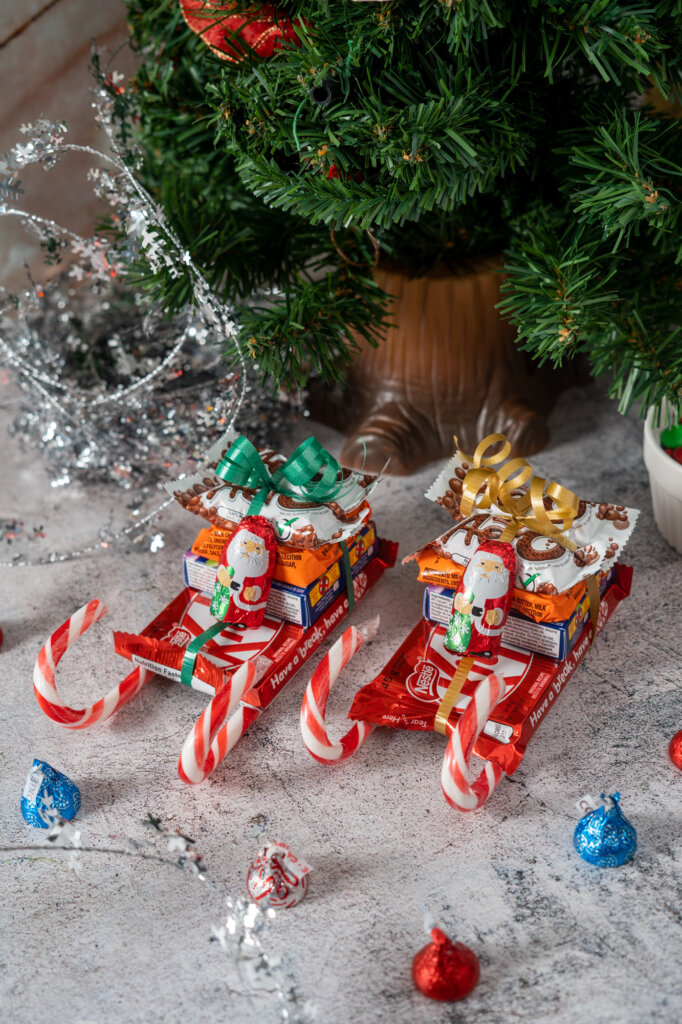
Christmas candy sleighs are a simple, but awesome gift idea if you’re looking for unique ways to gift candy.
Easily customizable with your favorite chocolate bars and candies, this DIY gift comes together in just a few minutes, and is a super affordable and creative way to spread some festive joy.
In this DIY candy sleigh tutorial, we’ll be showing you step by step how to make this ultra easy gift that will no doubt sweet any recipient off their feet!
We hope you find it helpful.
Pin for later:
Materials for Your Christmas Candy Sleighs
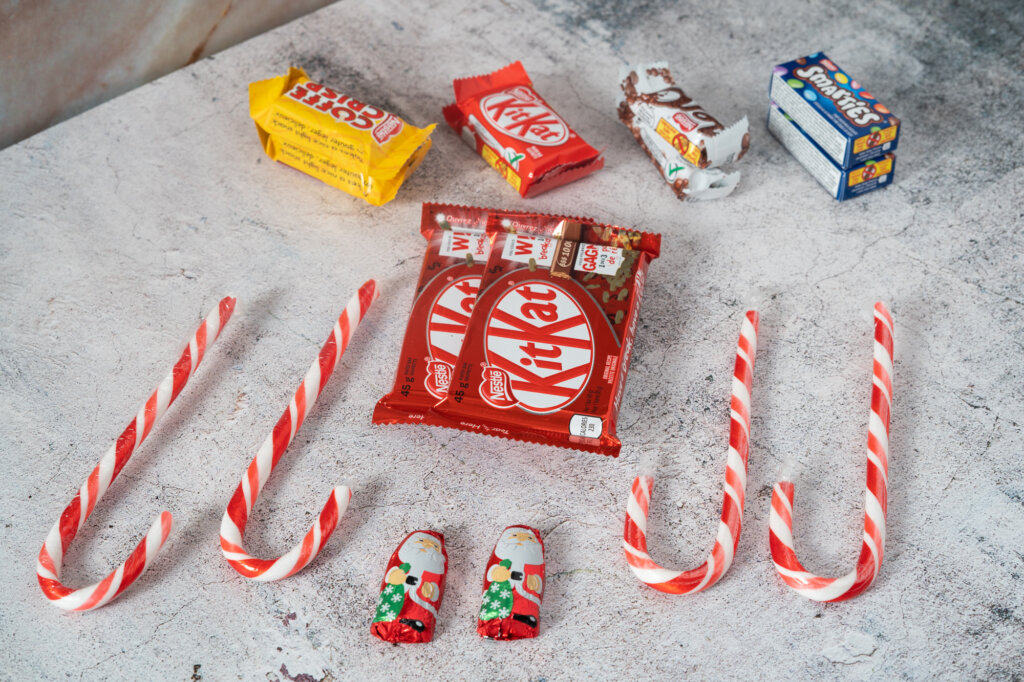
For this easy DIY Christmas gift, all you need (per sleigh) is:
- 1 flat & wide candy bar (e.g. a Kit Kat)
- 2 candy canes
- 5-6 mini candy bars of your choice
- 1 santa chocolate
- Double sided tape
- Curling ribbon
- Scissors
How to Make a Christmas Candy Sleigh: Step by Step
Have all your materials gathered? Now let’s get to work…
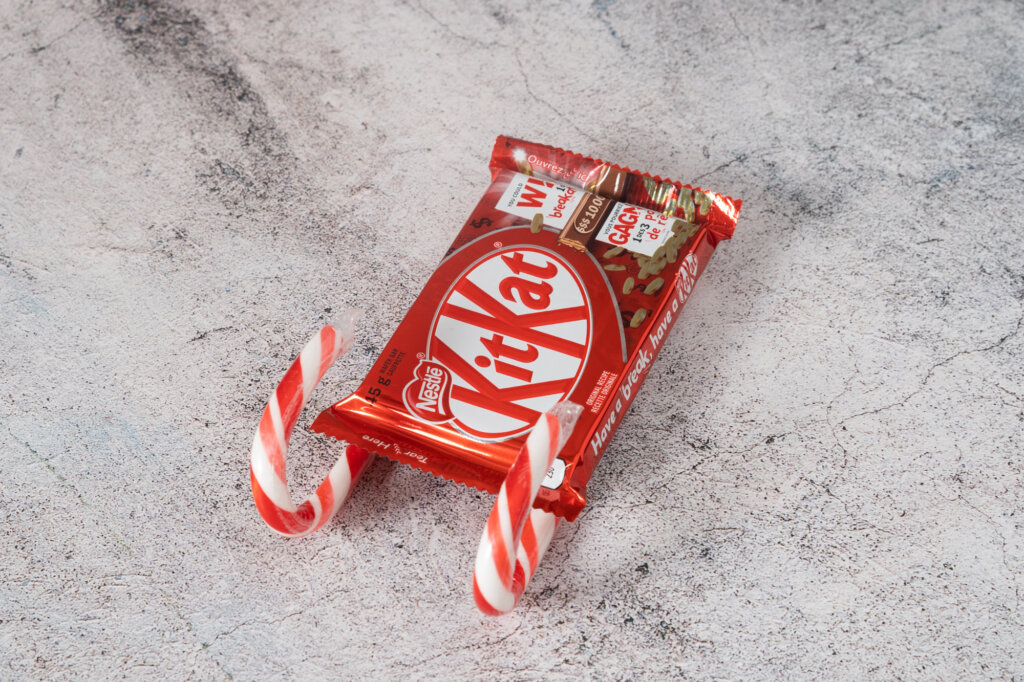
Step One: Make Your Base
Flip your Kit Kat (or other flat/wide chocolate bar) over and attach a strip of double sided tape on both long ends.
Stick your candy canes onto the tape so that the candy cane hooks wrap over to the front of the chocolate bar, like in this photo:

Flip it back over and it should already look like a cute little sleigh:
Step Two: Add Your First Layer of “Gifts”
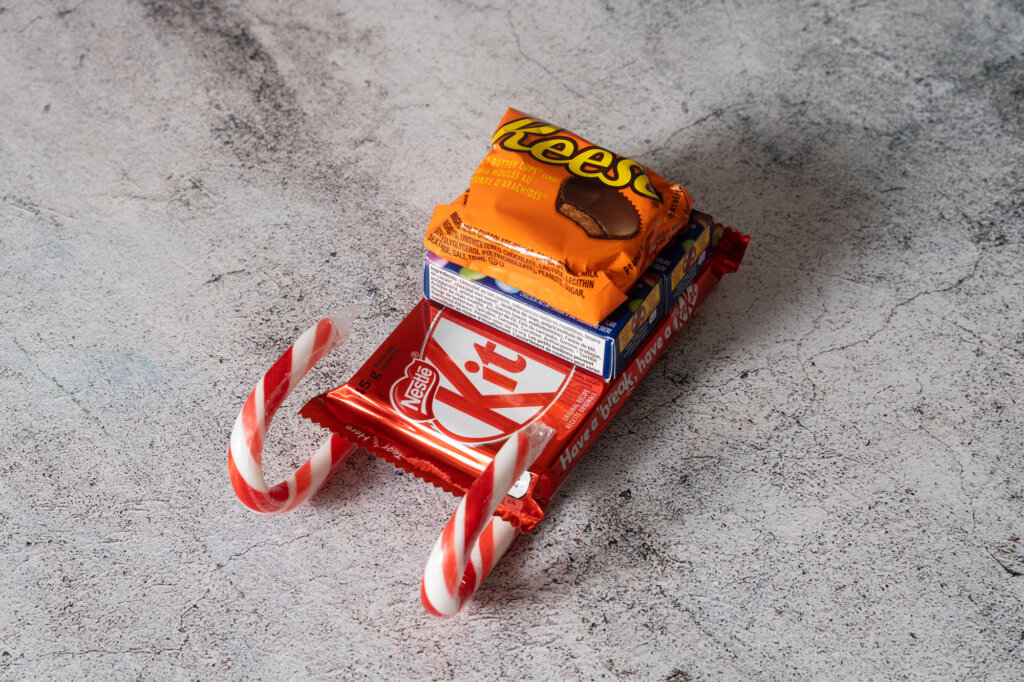
Stick some double sided tape onto the bottom of your first two chocolate bars. Press these chocolate bars down firmly onto your sleigh base, ensuring they are aligned with the back of the “sleigh”, like so:
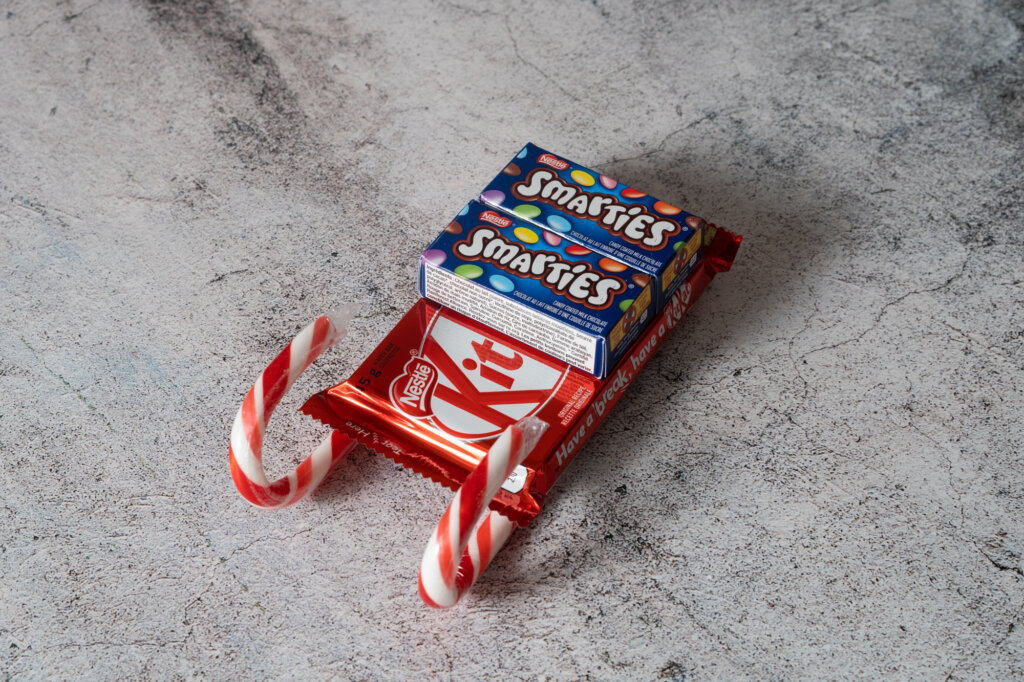
Step Three: Add Another Layer of “Gifts”
Stick some double sided tape onto the bottom of your next layer of chocolate bars. You can use two more mini bars, or switch things up by adding a larger single one like we did with a Reese cup. Press your 2nd layer down firmly over top the first, so that it looks like this:
Step Four: Add Your Final Layer of “Gifts”
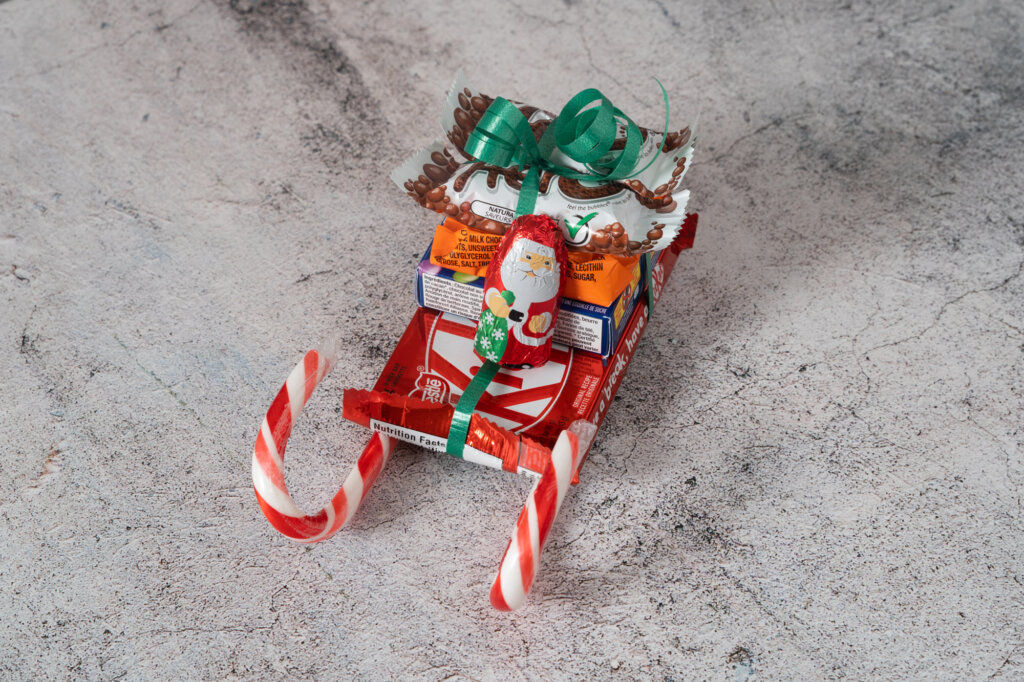
Finish up the stack of “gifts” on your sleigh by once again sticking double sided tape onto the bottom of two more mini bars, and adding them to your chocolate stack, like so:

Step Five: Add Your Final Touches
Finally, take some curling ribbon and tie a bow around your sleigh, then add your little chocolate Santa at the front by sticking some double sided tape on his back and pressing him onto the stack of candy bar gifts, like so:
Step Six: Gift Your Adorable Candy Sleighs
… if you’re able to part with them, that is!
As a bonus, you can also add a cute punny note, or a nice card. Here are some ideas for you if you want to take that route:
We Hope You Enjoyed This Christmas Candy Sleigh Tutorial!
Let us know in the comments if you have any questions, or send show us a photo of your creation!